How to Shop Kitchen Gadget Stores for Stainless Steel Cookware
Learn how to navigate kitchen gadget stores to find the best stainless steel cookware. Master ply ratings, magnet tests, and in-store inspection tactics.
The Metallurgy Matrix: Decoding Stainless Steel Grades
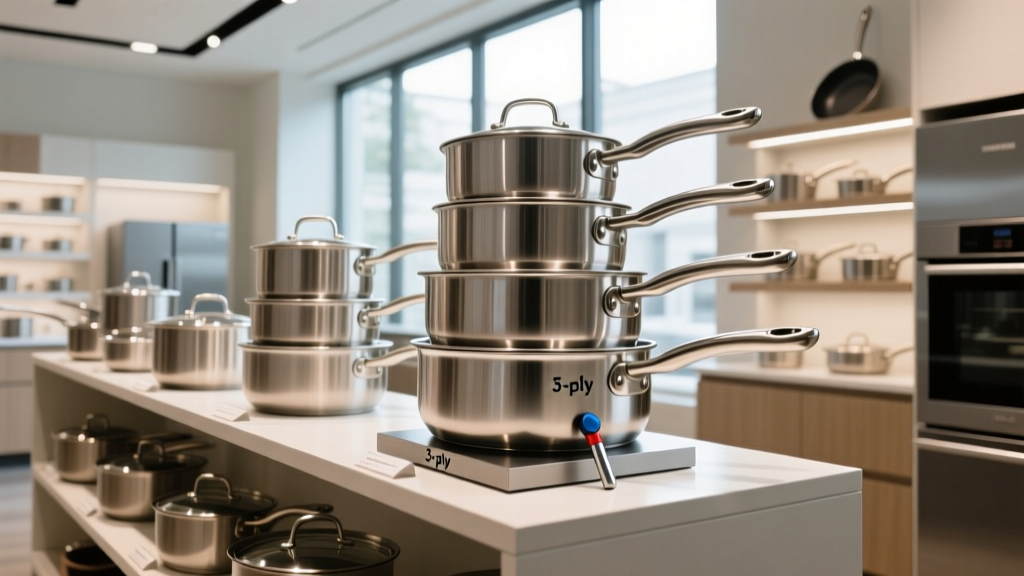
Walking into premium kitchen gadget stores in 2026 means facing a wall of gleaming metal with price tags ranging from $40 to $400 per skillet. Sales representatives often throw around terms like '18/10' and 'surgical grade' without explaining the practical implications. To make an informed purchase, you must understand the metallurgy stamped on the box.
Stainless steel is an alloy of iron, carbon, chromium, and nickel. The numbers you see (e.g., 18/10, 18/8, 18/0) refer to the percentage of chromium and nickel, respectively.
- 18/10 and 18/8 (300 Series): Contain 18% chromium and 8-10% nickel. Nickel provides superior corrosion resistance and a brighter polish. Functionally, 18/10 and 18/8 are identical in cookware performance due to manufacturing tolerances. This steel is non-magnetic and forms the interior cooking surface of high-end pans.
- 18/0 (400 Series): Contains 18% chromium but zero nickel. It is less resistant to pitting and staining but is highly magnetic. Manufacturers use 18/0 steel for the exterior bottom layer of clad cookware to ensure induction-stove compatibility.
Shoppers with nickel allergies often worry about 18/10 interiors. According to the FDA's guidelines on food contact substances, high-quality 300-series stainless steel is highly stable. However, cooking highly acidic foods (like tomato sauce) for prolonged periods in poorly manufactured or heavily scratched pans can cause trace leaching. For severe allergies, look for brands that use a ceramic or enamel interior, or stick to strictly low-acid cooking in your stainless pieces.
The In-Store Magnet Test: Your Secret Weapon
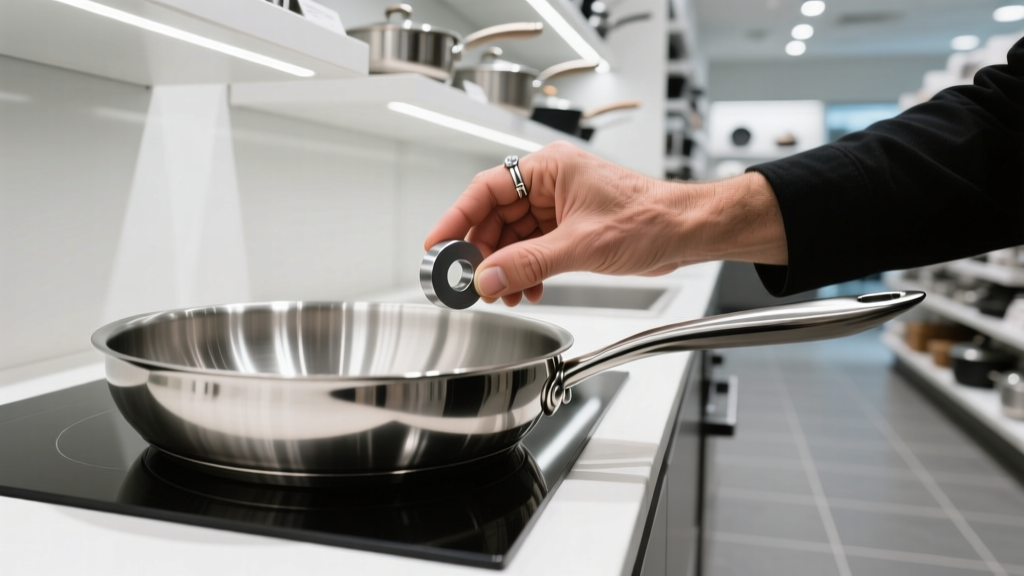
Never buy a stainless steel pan in a kitchen gadget store without performing the magnet test. Bring a small rare-earth (neodymium) magnet in your pocket. This single test reveals the pan's internal construction and induction compatibility.
- Test the Interior: Place the magnet inside the cooking surface. It should not stick, or only stick very weakly. This confirms the interior is 300-series (18/10 or 18/8) austenitic steel, which is highly corrosion-resistant.
- Test the Exterior Base: Flip the pan and place the magnet on the flat bottom. It should snap on firmly. This confirms the exterior layer is 400-series ferritic steel (18/0), meaning the pan will work flawlessly on induction cooktops.
- Test the Sidewalls: If the magnet sticks strongly to the sidewalls, you are likely holding a cheaper, single-ply 400-series pan that will rust and warp. Put it back on the shelf.
Step-by-Step Physical Inspection Protocol
Once a pan passes the magnet test, conduct a rigorous physical inspection. Kitchen gadget stores encourage you to touch the merchandise; use this to your advantage to check for manufacturing defects.
1. Evaluate the Handle Attachment
Look inside the pan at the handle rivets. Premium brands like All-Clad use flush-mounted or 'sweat-welded' handles where the interior surface is completely smooth. Protruding rivets create food traps that require tedious scrubbing. If the handle is spot-welded (no interior rivets at all), check the exterior for uniform weld beads; cheap spot-welds can snap under the leverage of a heavy, food-filled pan.
2. Check the Weight Distribution
Hold the pan by the handle with one hand. A 10-inch tri-ply skillet should weigh between 2.5 and 3.2 pounds. If it feels excessively heavy (over 4 pounds), the manufacturer likely used overly thick aluminum layers to mask poor heat-conductivity design, leading to wrist fatigue during tossing. If it feels suspiciously light, the steel gauge is likely under 1.0mm, which guarantees warping when subjected to high-heat searing.
3. Inspect the Lid Seal and Rim
Place the lid on the pan and attempt to spin it. It should rotate smoothly without grinding. Check the rim of the pan for a rolled edge or a flared dripless pouring rim. Flat, unrolled rims will cause sauces to run down the exterior of the pan when pouring.
Ply Construction: What to Look For on the Box
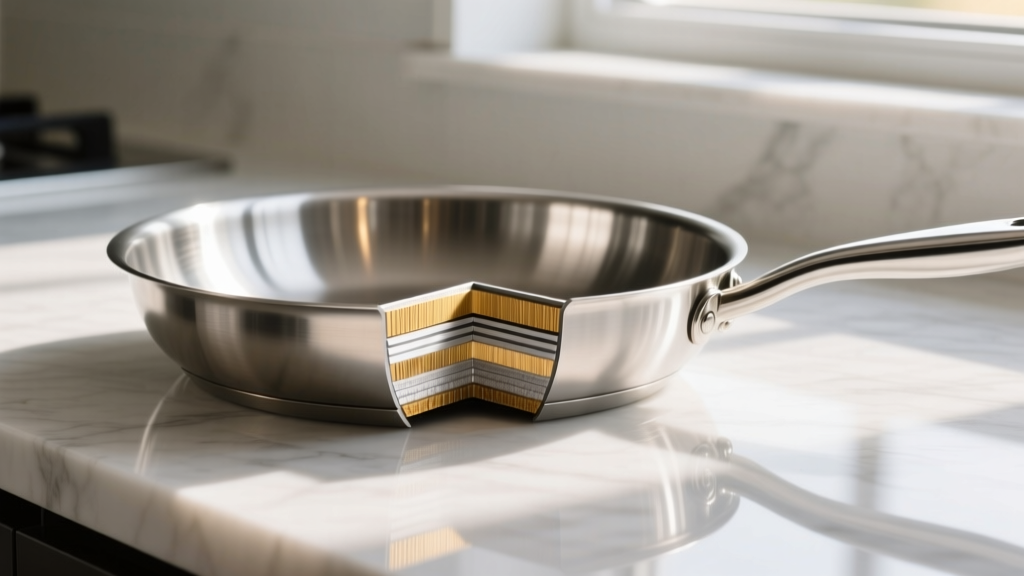
'Ply' refers to the number of bonded metal layers. Because stainless steel is a terrible conductor of heat on its own, manufacturers bond it to highly conductive metals like aluminum or copper. According to extensive thermal testing by Serious Eats, the construction type dictates the pan's responsiveness and searing capability.
| Construction Type | Layer Composition | Pros & Cons | Avg. Price (10-inch) |
|---|---|---|---|
| Disc-Bottom | Single-ply steel body with a thick aluminum/steel disc glued to the base. | Cheap, but sidewalls have zero heat retention. Prone to warping and scorching at the edges. | $40 - $80 |
| 3-Ply (Tri-Ply) | Steel-Aluminum-Steel. Fully clad from rim to rim. | The industry gold standard. Excellent heat distribution, lightweight, and highly responsive to burner adjustments. | $120 - $180 |
| 5-Ply | Steel-Alu-Steel-Alu-Steel or Steel-Copper-Steel-Alu-Steel. | Superior heat retention for deep frying or braising. Heavier and slower to heat up than 3-ply. | $200 - $300 |
| Copper-Core | Steel-Copper-Steel (usually 5-ply with copper center). | Unmatched thermal responsiveness for delicate sauces. Extremely expensive and requires polishing to prevent patina. | $350 - $500 |
When browsing kitchen gadget stores, physically look at the edge of the pan. If you see a distinct seam where the bottom disc meets the sidewall, it is a disc-bottom pan. If the layered edge runs continuously up the sidewall to the rim, it is fully clad.
Navigating Brand Tiers at Retailers
Specialty stores like Williams Sonoma or Sur La Table curate specific tiers. Knowing where brands sit in the hierarchy prevents you from overpaying for mid-tier quality disguised by premium packaging.
- The Heritage Premium (All-Clad): All-Clad D3 (3-ply) and D5 (5-ply) remain the benchmark. Manufactured in Canonsburg, Pennsylvania, their bonding process is patented and virtually eliminates delamination. Expect to pay $150-$250 per piece, but their lifetime warranty is honored without question.
- The Boutique Direct (Made In, Misen): Originally direct-to-consumer, these brands are increasingly featured in high-end independent kitchen gadget stores. They offer 5-ply construction at a 20% discount compared to All-Clad by optimizing supply chains, though their handle ergonomics can be polarizing.
- The Value Champions (Tramontina, Cuisinart MultiClad): Often found in department stores or the back aisles of specialty shops. Tramontina's Tri-Ply line (specifically the Brazil-manufactured models, not China) offers 90% of All-Clad's performance for roughly $60 per skillet. The steel finish may be slightly less polished, and handles are less ergonomic, but the thermal dynamics are exceptional for the price.
Store Hack: Ask the sales associate if the store brand (e.g., Sur La Table's in-house line) is manufactured by the same OEM as a premium brand. Often, store brands are produced in the same Asian or European factories as name brands, featuring identical ply construction but lacking the marketing markup.
Essential Accessories to Bundle at Checkout
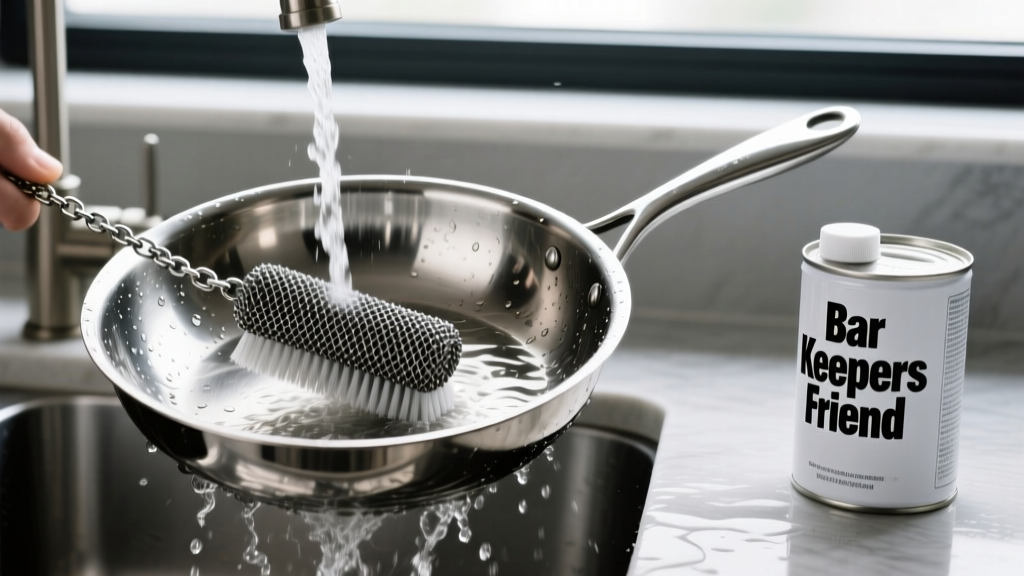
Stainless steel requires specific maintenance tools that standard sponges cannot provide. Before leaving the kitchen gadget store, ensure you add these three specific accessories to your cart:
- Bar Keepers Friend Powder (Not Liquid): The powdered version contains feldspar, a mineral abrasive that safely removes polymerized oil and heat-tint (the rainbow discoloration on steel) without scratching the 300-series surface. ($6 - $8)
- Stainless Steel Chainmail Scrubber: Essential for removing fond (browned food bits) after searing meats. Unlike wire brushes, the flat rings of a chainmail scrubber won't gouge the steel. ($12 - $18)
- Flared-Edge Stainless Fish Spatula: You need a thin, flexible, offset metal spatula to slide under delicate proteins. Plastic or silicone will melt or fail to get under a seared scallop. Look for a blade thickness under 1.0mm. ($15 - $25)
Final Checkout and Warranty Verification
Before handing over your credit card, inspect the box for the warranty card. Read the fine print regarding 'thermal shock.' Many mid-tier brands will void the warranty if you plunge a hot pan into cold water, which is a standard professional kitchen technique. Premium brands explicitly cover warping from thermal shock. Finally, check the return policy of the specific kitchen gadget store; specialty retailers often offer 90-day return windows on cookware, allowing you to test the pan's searing capabilities on your home stove and return it if the hotspots are unacceptable.
Written by
Marcus WebbMarcus Webb served as a U.S. Army logistics officer for 8 years, where he managed field equipment procurement and tactical gear evaluation across three combat deployments. After honorable discharge, he earned a certification from the Professional Knife Makers Association and became a certified Wilderness First Responder (WFR). Marcus has tested over 500 EDC products in extreme environments — from -40°F in Alaska to 120°F in the Mojave Desert — using military-spec testing protocols. His reviews of multi-tools, tactical flashlights, and survival gear are known for their rigorous methodology: controlled drop tests from 6 feet, 120-minute water submersion at 2 meters, and lateral torque testing at 45 Nm. He is a member of the Blade Show judging panel and contributes to OutdoorGearLab.